Pages

.

Brazilian Feijoada – Happy (and hopefully very lucky) New Year!!

We’ve posted about this before, but there’s a great, southern tradition of eating beans and greens on New Year’s Day to ensure good fortune in the coming year. 

Apparently, by eating “poor” the first day of the year, you align certain cosmic forces in your favor, which results in prosperity and good luck the rest of the year. Sounds crazy, right? I know, you’re way too sophisticated to believe in such lame supernatural shenanigans. Hey wait a minute…don’t you watch all those ghost hunter shows on cable TV? Busted! Hey, did you hear that noise?

Anyway, whether you believe in this kind of culinary clairvoyance or not, this Brazilian feijoada is one of the world’s great stews. The traditional good luck bean is the black-eyed pea, but here we’re celebrating the delicious, and very nutritious, black bean.

I tried to be clear in the video that this is just my version, and not some attempt at true feijoada authenticity, whatever that is. As long as you have black beans, and LOTS of smoked, salted, dried, and/or cured meats, you are well on your way to some kind of feijoada-like awesomeness.

In case you’re wondering, all I did for the greens was boil some kale in salted water until tender, and then sauté briefly in olive oil and garlic. It pairs perfectly with the white rice and rich stew, and while I can’t guarantee a year’s worth of wealth and good luck, I can promise you a delicious bowl of food. Happy New Year to all of you, and as always, enjoy!


Ingredients for 6 portions:
1 pounds dry black beans, soaked overnight
2 quarts water, plus more as needed (add more whenever stew looks too dry)
1 bay leaf
2 smoked pork chops
12 oz linguica
8 oz Italian sausage
4 oz smoked bacon
3 oz dried beef
1 onion
6 cloves garlic
1 tsp cumin
1/2 tsp coriander
salt and pepper to taste
For the crumbs:
1/2 cup breadcrumbs
1 tbsp olive oil
2 tsp grated orange zest
2 tbsp chopped Italian parsley

Basic steps:
- Soak beans overnight, add to pot with bay leaf, beef jerky, and any bones
- Simmer for 1 1/2 to 2 hours, or until beans are cooked, but very firm
- Add onion mixture and meats, and simmer for another hour, or until beans are very soft
- Add a splash of water at any point during the cooking if stew looks too dry
- Test and add salt near the end, depending on saltiness of meat

View the complete recipe

reade more... Résuméabuiyad

Creamy Lemon Herb Dressing


My last post of 2012. What a great year this has been! Food blogging and taking pictures has been a fun and learning experience. I've improved much but still have a ways to go. Meeting like minded people and being inspired everyday has been amazing. I look forward to what adventures lie ahead. I leave you all with this really wonderful dressing. I know many will be eating healthier as a New Year's resolution and this dressing will help you get some freshness in your meal plans. I personally found myself tipping the bowl to get the last of it. It's light and refreshing on its own, adding it to a fresh salad just makes it that much better. I've been waiting to find a great creamy style dressing that's easy to make at home and finally I've found one that fits my needs. This is raw, nut free, soy free, gluten free and of course vegan. I think this will amaze you as much as it amazed me. Happy New Year's to you all....Cheers!


The base of this recipe is hemp hearts. If you're unfamiliar with hemp seed hearts, you will want to add these great little seeds to your lifestyle. They are easy to sprinkle in smoothies, on salads, add some to the top of your toast and jam. In this recipe they create a wonderful creaminess. Hemp seeds are a great source of omega 3 & 6 and are a high quality complete protein. Four tablespoons, or 1/4 cup, of hemp seeds contain 15 grams of protein, and they're also a good source of fiber containing 2.5 grams per quarter cup. They also contain high concentration of vitamins and minerals such as iron, vitamin E, thiamine, riboflavin, folic acid and many other micro-nutrients that your body needs. Another great thing about hemp seeds is that they do not need to be soaked to aid in digestion, they can be eaten raw and the body will absorb and digest all nutrients readily and easily. They contain a lot of nutrition in a small package. If you love hemp hearts, you may also like my other recipes containing hemp hearts. Raw Healthy, Happy, Hemp Seed Cookie Balls Raw Creamy Miso Soup w/ Mushrooms...a few great ways to use hemp seeds!

Now, let's make some delicious dreamy creamy dressing...


Creamy Lemon Herb Dressing

Ingredients
  • 1/2 cup hemp hearts
  • 1/3 cup water, plus more as needed for thinning
  • juice of 1 medium lemon
  • a few strands chives, broken into 1 inch pieces
  • a few sprig leaves fresh dill 
  • a few sprig tops fresh cilantro and/or parsley
  • dash or two garlic powder
  • dash or two onion powder
  • himalayan salt to taste 

Using a blender, I used the magic bullet for this, combine ingredients and blend until smooth. Add water 1 tablespoon at a time until desired consistency. Taste for flavor adding anything extra to suit your taste...more lemon?...more herbs?...more garlic or onion powder? Chill before serving. Makes about 5 servings.

Store in an air tight container in refrigerator for up to a week.

Note: I have not made this in a regular blender. The magic bullet works wonders but if you don't have one this should work fine your blender at home. You may consider doubling the recipe if using a larger blender. Mix and match herbs to suit your taste.


Salad shown consists of romaine lettuce, grape tomatoes, cucumbers and topped with cracked pepper...simple and delicious!

Enjoy!


How to Freeze Fresh Herbs:

Fresh is always best, but I do find that I buy fresh organic herbs and then they get thrown away. If you find that is the case for you, below is a few simple ways to freeze your herbs making them easily ready for this recipe and others.

Fresh dill sprigs can be frozen for up to a couple months, but they will darken in color. There is no need to thaw before using. Frozen dill weed will still always have more flavor than dried dill. Below are two methods for freezing dill.

Cilantro is best used fresh, freezing turns it mushy, so fresh is best for great flavor.

Parsley is another herb that freezes well. You can freeze parsley the same as dill by using one of the two methods provided below.

Chives also freeze well. Frozen chives have the same flavor as fresh chives. To freeze chives you can cut the strands into small pieces, lay on cookie sheet and place in freezer for about 20 minutes. Once frozen place in air tight container, should last up to year. You can also freeze by using the ice cube tray method below.

Whole Stalks: 

Dill: Place a bunch of dill, stalks and all, in a reusable plastic bag or airtight container. Once the dill freezes, use clean kitchen shears to remove the needed portion, then return the remaining dill to the freezer. Entire stalks can be used to flavor soups and stews, then use a slotted spoon to remove the dill just before serving.

Parsley: Chop parsley into small pieces, place in reusable plastic bag or airtight container.

Ice Cubes:

An ice cube tray provides serving size cubes of herbs that can be tossed into soups, stews and other hot dishes. Dice the herbs, place a small amount in each section of an ice cube tray, add water and freeze. Once frozen, remove the cubes and store them in resealable plastic bag or freezer container. You can also add veggie broth instead of water, or combine herbs as well for a ready to use herbal blend.

reade more... Résuméabuiyad

Spelt & Oat Pancakes with Blueberry-Orange Compote


I saw this recipe from the Minimalist Baker and decided I have to veganize it. In a word...Delicious! My pictures do not do it justice, I almost didn't post it but decided what the heck. Take a look at the original recipe and you'll understand why I just had to attempt this recipe. And is so happened, I had just received a whole bag full of oranges that needed to be used and also had a bag of frozen organic blueberries in the freezer from summer ready to go. I'd say this recipe appeared at the perfect time. I love synchronicity's like that, don't you! I was all set and ready to go....away I went, off to the kitchen....my kitchen of love. :)


Spelt & Oat Pancakes with Blueberry-Orange Compote

Ingredients
  • 1 cup spelt flour (or 1 cup all-purpose or 3/4 cup whole wheat pastry flour)
  • 1/2 cup oats (old fashioned or quick oats)*
  • 1 tablespoon sugar (coconut, raw or pure cane sugar)
  • 1 teaspoon baking powder
  • 1/2 teaspoon baking soda
  • pinch of salt
  • 1 cup vegan buttermilk (1 cup non-dairy milk + 1 tablespoon lemon juice or vinegar)
  • 1 flax egg (1 tablespoon flax meal + 3 tablespoons water), optional
  • 1 teaspoon vanilla
  • 1 1/2 tablespoon coconut oil, melted
 Compote
  • 1/2 cup blueberries (frozen or fresh)
  • zest of one orange
  • 2 tablespoons orange juice
  • 1 teaspoon sugar (coconut, raw or pure cane sugar)

If using a flax egg, place ingredients in small bowl and set aside for about 10 minutes to set. This is optional. I have made pancakes many times without the need for an egg replacement but you can think of it as added nutrition as flax meal is very good for you!

Preheat griddle or pan to medium heat. Also place small saucepan over medium heat. Add blueberries, sugar, orange juice and orange zest and bring to a simmer, mashing the berries with the back of a spoon. Once warm, bubbly and thickened, remove from heat and set aside.

Combine the flour, oats, sugar, baking powder, baking soda and salt in a large bowl. In a small bowl, whisk together the buttermilk, flax egg, vanilla and coconut oil. Add wet ingredients into the dry mixture and blend until just combined.

Using a 1/4 cup measuring cup, scoop and pour pancake mix onto a lightly greased griddle or skillet. Cook until bubbles form along the top and edges, about 2 to 3 minutes...bottom should be golden brown. Carefully flip and cook for another 2 minutes or so until golden brown underneath.

Serve warm with orange-blueberry compote and pure maple syrup. Serves two generously.

Enjoy!

*If you don't care for whole oats in your pancakes (like my daughter), you can process them to be a finer consistency or use the quick oats since they are a bit smaller pieces. They add a nice flavor and break up the wheat ratio.

reade more... Résuméabuiyad

Garlic & Blue Cheese Green Bean Almondine – I Just Couldn’t Do It

When I went to culinary school in the early Eighties, the chef instructors used “Green Beans Almondine” as a prime example for the kind of stodgy, clichéd, faux-fancy, vegetable side dishes that we were supposed to eradicate shortly after graduation. 

This was the dawn of a new age of American cookery, and something so old-fashioned as green beans almondine had no place along side our newfangled raspberry vinaigrettes and cajun fish.

There was only one problem with this prohibition...green beans and almonds tasted really good together, and made for a lovely side dish once in a while. Of course, fearing you’d be laughed out of the young, hot cooks club (hot from heat, not from hotness) you just didn’t dare make or serve such a dinosaur.

Anyway, to make a long story short, I’ve finally done a green beans almondine video, but added roasted garlic and blue cheese to it, just in case any of my old classmates are watching.  I actually did this at Thanksgiving, sans nuts, and it got rave reviews, so I had a feeling the addition of the slivered almonds would work just fine, and they did! I hope you give this a try soon. Enjoy!


Ingredients for 4-6 portions:
1 pound green beans, blanched in boiling, salted water until almost tender
3 heads garlic
olive oil
salt and pepper to taste
cayenne to taste
1/3 cup sliced almonds browned in 1 tsp butter
2 oz Pt. Reyes blue cheese, or other blue cheese
400 degrees F. for 15 minutes

View the complete recipe

reade more... Résuméabuiyad

Favorite Winter Recipes for a Gluten-Free Diet

Gluten free recipes image for Winter and Christmas holidays and comfort food
Warm up Winter with cozy gluten-free recipes.

Cook Up a Lustrous, Cozy Winter


Cozy up and find sustenance with my updated collection of favorite winter recipes, from classic comfort food like gluten-free mac and cheese, to nourishing slow-cooked stews and hearty healing soups that warm you body and soul.

From cider roasted vegetables and turkey enchiladas to holiday goodies like Flourless Chocolate Cake, and Gingersnap Stars, you'll find plenty of winter favorites to keep you well fed.


Read more + get the recipe >>
reade more... Résuméabuiyad

Yukon Gold and Sweet Potato Home Fries


Home fries are always a welcome addition to any cozy morning in the cool fall and winter months. These have a nice combination of a sweet and spice going on. The addition of a little chipotle powder brings an added warmth to the potatoes. This dish is easy to put together and will surely be enjoyed with those whom are so lucky to be apart of your meal. They were delicious!

On a side note, I was gifted these wonderful wooden utensils for Christmas from my son's girlfriend of two years. Time flies...it's hard to believe they have been together that long. My high school sweethearts they are! You never know what the future holds, my parents were high school sweet hearts and are still together after almost 45 years. These are lovely, and much appreciated, utensils from a lovely girl. And they worked wonders for dishing out these home fries. :)


Yukon Gold & Sweet Potato Home Fries 

Ingredients
  • 5 or 6 Yukon gold potatoes, cut into 1 inch cubes
  • 2 large sweet potatoes, cut into 1 inch cubes
  • 1 red bell pepper, chopped 
  • 1 onion, chopped 
  • 2 tablespoons olive oil or sesame oil 
  • 1 tablespoon thyme, dried or fresh 
  • 1 teaspoon garlic powder 
  • 1/2 teaspoon chipotle powder, or to taste 
  • dash or two allspice or nutmeg, optional 
  •  Himalayan salt & cracked pepper, to taste 

In large skillet over medium heat, heat oil and cook onions and bell peppers until onions are softened, about five minutes. Add potatoes, herbs and spices, cook on medium to medium low heat for about 25 - 30 minutes stirring occasionally. The sweet potatoes will take longer than the Yukon golds, covering the skillet with the lid ajar will help. You want your potatoes to brown and crisp a little on the edges. Be sure to scrap the bottom of the skillet as well to get all the pieces that may stick to the bottom...they will add nice flavor and some crispy texture to your dish. Serve right away. Serves four generously.


I paired mine with a nice tofu scramble which included sun-dried tomatoes, onions, thyme, garlic powder, turmeric, dash of chili powder, sea salt, cracked pepper and a little bit of chopped parsley. Just simple and easy, using what I had on hand. Spices make all the difference in the world. Hope this inspires something within. :)


 Enjoy! 

Adapted from this recipe at Epicurious
reade more... Résuméabuiyad

Next Up: Not Exactly Green Beans Almondine


reade more... Résuméabuiyad

Smoky Chipotle Maple Tofu Sandwich


I've had my eye on this recipe for a while and finally got around to putting it together. Let me tell you, it did not disappoint. My only additions were adding a little bit of ground chipolte pepper and using a bit more of each ingredient than what it called for in the marinade. I love the caramelized onions and the avocado mash as the condiment...so good! I love using avocado or a light flavored thin style hummus as a sandwich spread. You could also use veganaise too. If you use the avocado, I ensure you that you will not miss the old standard spreads. The tomato will also lend some nice juices into the mix. 


This is reminiscent of a B.L.T in some ways....or rather it might be called a T.L.T. However you call it, this was a great find and a keeper! And, it will leave your home smelling delicious. :)


Smoky Chipotle Maple Tofu Sandwich

Ingredients
  • 1 block (15oz) organic firm or extra firm tofu, drained, pressed and thinly sliced
  • 1 onion, thinly sliced
  • 2 tablespoons sesame or olive oil, divided
  • 1 medium tomato, sliced thin
  • Dijon or stoneground mustard, to spread
  • 1 avocado, mashed, to spread
  • a few leaves of your favorite sandwich greens, red or green leaf, romaine, iceberg, etc...
  • salt to taste
  • 6 slices bread of choice

Marinade
  • 2 cloves garlic, crushed and minced 
  • 3 tablespoons pure maple syrup
  • 2 tablespoon tamari, bragg's or soy sauce (use less if using soy sauce, may be too salty) 
  • 1/2 teaspoon liquid smoke
  • a few dashes of chipotle powder, to taste


In a small bowl, mix together your marinade. Place tofu in a shallow bowl, or pie dish, along with the marinade and let soak for about 1 hour turning carefully once or twice in between. 

Once the hour is almost up, caramelize your onions using 1 tablespoon oil. Heat oil over medium heat, add onions, turn down heat to medium low, stir often and cook until they start to brown and caramelize. May take 10 to 15 minutes or so. Once done, set aside.

In same skillet, heat remaining oil and cook tofu over medium high heat. Add a little extra chipotle powder & salt if desired. Once tofu has browned, gently flip and brown the other side. It's ok if it gets a little crispy too! If you feel it is drying out too much, add some of the juices from the bowl it marinated in for extra moisture. When done, remove from heat.

Toast your bread. Spread one side of toast with mustard and the other with a layer of mashed avocado. Over the avocado, layer your lettuce, tomato, caramelized onions and tofu. Top with your other slice of bread. You can either eat it as is or slice in half. Serves three.

Notes: If you don't like caramelized onions, substitute with raw.

Enjoy! 

Recipe and photos inspired by I Love Vegan, find original recipe here
reade more... Résuméabuiyad

Merry Christmas!

Photo (c) Flickr user kevindooley
Michele and I wanted to wish all of you who celebrate, a very Merry Christmas. Hopefully you’re surrounded by the people you love, and/or a ton of great food. 

We have a new video posting on Thursday, but until then I’m going to try and take a few days off from staring at the omnipresent computer. Seasonal apologies for any lags in responding to comments or emails. Enjoy the rest of your holiday!
reade more... Résuméabuiyad

Because Oyster Rockefeller Sounds Rich

There’s much debate over how many of America’s greatest recipes got their name, but that’s not an issue with Oyster Rockefeller. Thanks to the rich, money-colored butter sauce, this decadent creation’s name pretty much wrote itself.

Besides the obvious, superficial reasons, associating your new shellfish appetizer with the most affluent family of the day was a stroke of social media genius. Hey, just because Twitter wouldn’t be invented for another 107 years doesn’t mean people didn’t “retweet” things.

When Jules Alciatore invented the dish in 1899, he wasn’t trying to create a classic, new American shellfish appetizer; he was simply trying to replace snails in his diet. That’s right, what would become America’s greatest seafood appetizer (sorry, crab cakes) was just a delicious work-around for a serious shortage of French snails in New Orleans.

To say the customers of Antoine's were happy with this local substitution would be a huge understatement. They went crazy for it. The dish quickly gained national attention, with the most famous celebrities, politicians, and foreign dignitaries of the day stumbling over each to get a plate or three.

The original secret recipe really is a secret; so all versions, including mine, are just guesses. There is agreement among foodies who study such matters that spinach was not part of the formula, but the much spicier and more flavorful watercress was used.

Neither were mushrooms, bacon, ham, cheese, garlic, or any other later day add-ons. Not that those ingredient aren’t good baked on top of oysters, but that just wasn’t how Mr. Alciatore rolled. So if you are looking for a special occasion appetizer that tastes, looks, and makes you feel (and sound) rich, then I hope you give this oyster Rockefeller recipe a try. Enjoy!

Makes enough for about 3 dozen oysters Rockefeller:
1 stick butter (1/2 cup) room temp
2 tbsp minced green onions, white and light green parts
2 tbsp diced celery
2 tbsp fresh chopped tarragon
2 tbsp fresh chopped Italian parsley
1 cup chopped watercress leaves
salt, pepper, and cayenne to taste
2 tbsp Pernod liquor
1/4 cup bread crumbs
3 dozen oysters on the half shell

View the complete recipe

Bonus How to Open Oyster Video!

My friend Tamar, from Starving Off the Land, does a much better job of showing how to open oysters, but that’s only because she raises them and gets a lot more practice! That, and she’s better at it. Also, a special thanks to Sky Sabin Productions for their fine work on this.

For some additional shucking info, and tons of oyster recipe links, you can also check out this article on Allrecipes.com. Enjoy!
 
reade more... Résuméabuiyad

Cranberry Pistachio Energy Bars


A homemade granola bar with a bit of a chew and a crunch at the same time. Lot's of flavor and full of goodness you can taste in every bite. So colorful too! Be warned, these are delicious and won't last long. But no worries, they're easy to make so you can whip some up in cinch. :)


I originally started these as a no bake granola bar like the recipe at Gimme Some Oven, but felt they were a bit to sticky to handle, even after chilling in the fridge a while. I decided to bake them in order to let the maple syrup harden and stiffen them a bit, soaking up that excess moisture. They came out really good and still have a bit of chewiness but without the stickiness. If you want them a bit crunchy bake for a little longer. They really are a vibrant and delicious treat! This recipe will give you the option to decide if you want to bake or not...a lot may depend on the date paste and how much moisture there is...but you may find that you prefer it unbaked. 


Cranberry Pistachio Energy Bars

Ingredients
  • 1 cup packed medjool dates, pitted and chopped (about 15 dates)
  • 1/4 cup pure maple syrup
  • 1 tablespoon chia seeds, optional
  • 1 tablespoon hemp hearts, optional
  • 1 tablespoon ground flax seeds 
  • 1/2 teaspoon cinnamon, optional
  • pinch of sea salt
  • 1 1/2 cups rolled oat (I used GF)
  • 1 cup unsalted pistachios
  • 1 cup dried cranberries or fresh chopped
  • 1/4 cup semi-sweet chocolate or a dark chocolate bar chopped into small peices, optional

Place dates, maple syrup, chia seeds, hemp hearts, flax seed meal, optional cinnamon and salt in food processor/high speed blender and process until it becomes a paste like consistency. Move date paste to a medium size bowl and add the remainder of the ingredients, mix well.

In a loaf pan or 8x8 pan, lined with parchment paper or greased with coconut oil, spread the mixture evenly to all edges and corners, press down gently but firmly to ensure a compact mixture. Place in fridge for 30 minutes before removing from pan and cutting into bars.

Once chilled, gently remove loaf and place on hard surface. Cut into any size bar you like. If you feel that they are just right for you without baking than your done and can enjoy one right now, if not continue....also, you may decide to try a few bars just to see how it works for you.

Preheat oven to 350 degrees. Place bars on a prepared cookie sheet with either the same parchment paper used to chill or greased, bake for 15 minutes. Remove from oven and let cool completely. I put mine in the fridge to cool as I was being a bit impatient with this extra step but well worth it! It may take an hour or two to completely cool, especially if you used chocolate.

Store in an air tight container or keep in the fridge if you like. Eat within two weeks. If using fresh cranberries it's best to eat within a week. (I highly recommend trying some fresh cranberries, they add a nice tartness with the sweetness of the other ingredients)

Enjoy!

A little picture tutorial and more...


Date paste...depending on the freshness of your dates will determine how thin or thick your paste is. The paste shown here was with very fresh dates, they were moist and soft creating this very moist paste...this was almost too moist but I also used 1/3 cup syrup instead of 1/4 cup, probably didn't need to use that much with such soft dates. I've also used older dates with less moisture and added a tablespoon or so extra maple syrup to the paste for added moisture. Use your judgement...if you need any extra moisture at all it should only be a tablespoon or two at most. If you feel your paste is too wet, add extra oats in the next step.


I used fresh chopped cranberries in this batch...the fresh cranberries added a little tartness and paired well with the sweetness of some of the other ingredients without adding refined sugars that are usually in dried cranberries. You can find organic dried cranberries that use pure cane sugar or apple sauce to sweeten the berries. Fresh is always best so give it a try sometime, you may be surprised how good they are in this recipe.


Gently pack the mixture into a lined loaf pan, chill, cut and bake if desired. I spy my little Piper girl, always underfoot waiting for something to drop, or a hand to reach down and give her some love. We've had her since Halloween of 2010, she was a rescue dog and needed a home, and we needed her little spirit...it worked out perfectly. :)

Hope this inspires something wonderful in your future. Happy Holidays. :)

Inspired by this recipe here.

reade more... Résuméabuiyad

Next Up: Oyster Rockefeller


reade more... Résuméabuiyad

Salted Chocolate Pecan Sandies (Gluten Free)


I love anything pecans, and when you add some chocolate to the mix you've really got a winner! These are a welcome addition to the recipe list and my go to baked cookie. The recipe consists of an almond flour/meal and has a nice lightly sweet flavor, especially from the coconut sugar which gives it a nice caramel flavor. And the salt adds to the delightfulness of these cookies bringing an added touch that will leave you wanting another bite, and another. Pair with a nice glass of your favorite non-dairy milk, or tall glass of water, and enjoy this chocolate chip style cookie...not too crisp, not too soft...just right. They are kid tested and most definitely mother approved! When the craving for a baked cookie comes around this will be the one!


I made this batch with half chocolate chips and half without. The above picture will be what the dough should roughly look like after blending well and before adding in the chocolate chips. I used almond meal in this recipe as I like to make my own. If using almond flour, your dough will be much lighter in color since the skin will have been removed by the manufacturer before processing. 

I scooped out rounded tablespoons, rolled into about a one inch ball, placed on the cookie sheet and flattened slightly. They will puff up a little when cooking so leave at least a half an inch or so between cookies. 

Also, Im looking into a silicon mat to use instead of parchment paper. Coconut oil works great too but having a silicon mat handy will be welcome. It may interest you also...you can find out more about them by looking at the reviews in the following link: Silpat Non-Stick Baking Mat


Salted Chocolate Pecan Sandies

Ingredients
  • 2 cups packed almond flour or almond meal*
  • 1/4 cup coconut palm sugar, turbinado sugar or pure cane brown or white sugar
  • 1/2 teaspoon cinnamon
  • 1/4 teaspoon baking soda
  • 1/4 teaspoon sea salt
  • 1/4 cup coconut oil, melted
  • 1/4 cup pure maple syrup, warmed
  • 2 teaspoons vanilla
  • 1/2 cup pecan pieces (raw or roasted)
  • 1/4 or so cup semi-sweet chocolate or dark chocolate chunk pieces, you can place some stategically on top as well
  • sea salt to garnish

Preheat oven to 325 degrees.

Combine the first five dry ingredients in medium sized bowl. In a small bowl, add the coconut oil and maple syrup together, heat until warmed and coconut oil is melted. Add in all three wet ingredients to the dry mixture and blend well. Mix in the pecans and chocolate chips. 

Prepare a baking sheet with coconut oil, parchment paper or use a non-stick mat. Scoop out rounded tablespoons full and roll dough into balls about an 1 inch or so in size, place on cookie sheet and flatten slightly with your fingers. Leave about a half inch to an inch between cookies as they will expand when cooking. Sprinkle entire batch with sea salt. Bake for 20 minutes. They may look like they need to cook more but don't worry once they cool they will darken slightly, harden a little and be a perfect cookie. Let cool and enjoy!

Makes about 16 to 18 cookies.

* I make my own almond meal in a food processor. 1 1/2 cups of almonds will easily get you 2 cups of flour/meal. It's super easy...just process for about 4 minutes, depending on your processor. Store any leftover flour in a mason jar or sealed container of choice for later use.

Happy Baking!


Inspired by this recipe from Comfy Belly

reade more... Résuméabuiyad

Classic Lobster Bisque – Finally!

I usually don’t have a good answer for why I’ve not gotten around to filming certain iconic dishes like risotto, beef Wellington, and puff pastry; but when it comes to lobster bisque, I do have a great excuse.

I won’t bore you with the details of how the tradition started (translation: I don’t remember), but for as long as I can remember, I’ve always made lobster bisque on Christmas Eve, to celebrate my sister-in-law Jennifer’s birthday.

And since the few days leading up to Christmas are always so busy and hectic with shopping, cooking, and travel, I’ve just never felt like I’ve had the time to set up the camera to properly film the procedure. Well, this year I decided to give it a go, and despite all the aforementioned challenges, I was very happy with how this came out.

One word of warning: this recipe requires live lobsters, brandy, and heavy cream. If you can’t get, or don’t want to use those ingredients, then you’ll have to make something else. Sorry, but this recipe is too sacred for substitutions.

Speaking of live lobsters, I know many are skeptical that these “bugs” can actually feel pain, but to play it safe, I recommend putting them in the freezer for 20 or 30 minutes to knock them out cold before their ultimate demise.

I only showed the cracking and the picking of the lobster meat very briefly, as this video was already too long for my tastes, but below I’ll link an additional tutorial that show this in more detail. Yes, this soup takes a little bit of work and expense, but I think you’ll agree with me (and Jennifer) that all the effort is well worth it. Enjoy!


Makes about 1 1/2 quarts:
2 live lobsters (about 1 1/2 pounds each)
1 onion, chopped
2 rib celery, chopped
3 quarts cold water (this will reduce by about half during the entire cooking process)
3 cloves garlic
4 springs fresh thyme
1 bay leaf
1 cup crushed tomatoes
1/4 cup tomato paste
2 tsp paprika
1/3 cup white long grain rice
2 tbsp cheap brandy (inexpensive brandy tends to be a little sweeter, and works well here)
1/2 cup heavy cream, or more if you like it creamier
salt and cayenne to taste
1 tbsp chopped tarragon to garnish

Bonus Lobster Meat Recovery Video: 
This video shows the picking of the lobster meat in much more detail than I did. Since they are boiling the lobster, you can just skip to the part where he is liberating all the meat. For more general lobster info, you can also check out this page on Allrecipes.

reade more... Résuméabuiyad

Cumberland Sauce – It Only Sounds Stuffy

I’ve always wondered why Cumberland sauce wasn’t more popular around the holidays. It’s such a delicious and versatile condiment, and just as easy and fast to make as any cranberry sauce out there.  Maybe it’s the name?

Cumberland sauce sounds more like something that the Queen would be spooning over a Quail en Croute than it does Uncle Charlie over a slice of ham. However, despite this sassy sauce’s upper-crusty sounding name, it’s actually quite rustic.

My “Black Cumberland” version uses black currants instead of the traditional red, and also includes some very browned-blackened onions, but like all similar recipes, this begs for even further adaptation depending on the meat. Maybe a little mint for lamb, or a touch of cardamom for that smoked duck breast?

Notwithstanding any flavor variations, you will still need to decide whether to serve hot or not. I definitely prefer the thick, shiny cooled-down version as shown, but happily, there’s no wrong choice. I hope you give this extra special holiday sauce a try soon. Enjoy!


Ingredients to make about 1 1/2 cups Cumberland Sauce:
1 tsp vegetable oil
1/2 cup minced onions
1 cup black or red currant jelly
zest from 2 oranges and 1 lemon
1/3 cup red wine
1/2 cup orange juice
2-3 tbsp lemon juice
2 tsp black pepper, or to taste
1 tbsp brown sugar
1/4 tsp dry mustard
pinch cayenne pepper
1/4 tsp ground ginger

reade more... Résuméabuiyad

Winter Holidays: Celebrating Gluten-Free

Gluten free chocolate gingerbread
Celebrating gluten-free in style.


Looking for inspiration and recipes for your gluten-free Christmas breakfast? Winter solstice brunch with friends? Vegan Hanukkah guests? A romantic New Year's Eve? Some simple winter comfort food?

Here is my collection of holiday favorites. Browse gluten-free recipes (most are dairy-free as well) and create your own winter holiday menu. Celebrate gluten-freestyle.

With love.


Read more + get the recipe >>
reade more... Résuméabuiyad

Holiday Granola – Only 8 Edible Gift Making Days Until Christmas!

When I was asked to take part in a special holiday YouTube playlist called, Christmas Morning Breakfast,” I started thinking about seasonal variation on things like eggs benedict, quiche, and French toast. But then I realized…you can’t wrap those things up and give them as an edible gift, so I decided to do this granola instead.

We’ve covered the edible gift topic before, and discussed the fine line between, “Wow, what a creative and thoughtful gift!” and “Wow, what a cheapskate!” Happily, when it comes to this delicious, crunchy treat, one taste and the lucky recipient will forget about any ulterior economic motivations.

Since this was a Christmas-themed recipe, I went with lots of festively colored dried fruit, but the beauty of the granola technique is that it pretty much works with anything. I love the looks of the green pumpkin seeds, but things like hazelnuts and pecans would also work wonderfully.

As I mentioned in the video, it’s really up to you to determine the cooking time. I tend to like mine just golden-brown, but many enjoy the deeper, nuttier flavor of a longer roasting. Since you are pulling and tossing every 10 minutes, this is pretty easy to monitor, but just be careful towards the end, as it can get bitter if you go too far.

Anyway, whether this is for a quick and easy holiday breakfast, with milk or over Greek yogurt; or you are going to package some up as a stocking stuffer for the foodies in your life, I hope you give this a try soon. Enjoy!


Ingredients for about 6 cups of Granola
3 cups rolled oats
1 cup sliced almonds
1/2 cup raw pumpkin seeds
1/2 cup shredded coconut (pure coconut, not candied)
3/4 cup packed brown sugar
1/2 cup maple syrup
3 tbsp vegetable oil
1 tsp salt
1/2 cup chopped candy covered chocolate pieces (like M&M’s)
1/2 cup golden raisins, chopped
1 cup mixed dried fruit (any combo of cranberries, cherries, strawberries, blueberries, etc.)
*Bake at 325 degrees F. for 30-40 minutes or until browned.
reade more... Résuméabuiyad

Pasta and Bean Soup with Kale


I don't know about you, but I love soups! So hearty and filling they can be. This is one of those soups that you can count on to leave you feeling satisfied. As the temperatures drop a nice warm bowl of pasta, beans & greens will hit the spot. The recipe will make enough to feed a large family or if not feeding a large family you will have leftovers to easily reheat and enjoy. I highly recommend using a stock pot since it will yield a lot of soup. Let's put it together...


A few flavorful herbs like sage, bay leaves and thyme...


Add your pasta of choice. I am finishing up the last of my whole wheat pasta and will be using gluten free pastas made from quino or rice instead. Use any pasta type you like from shells, macaroni, penne, bowtie, ditalini, etc. 


I used Tuscan kale for this and it was delicious. It has such a brilliant green color and is one of my favorite kale varieties. Kale is king of the greens, it's packed full of nutrients! Put it all together with a few extra vegetables and spices and voila...a healthy, hearty soup for the mind, body and soul!


Pasta and Beans Soup with Kale

Ingredients
  • 1 pound dried cranberry beans, or great northern beans*
  • 4 cups vegeatable broth
  • 4 cups water
  • leaves of 3 sprigs of thyme, or 1 tablespoon dried
  • 3 - 5 leaves of sage, chopped, or 2 teaspoons dried
  • 2 -3 teaspoons smoked paprika**
  • 3 bay leaves
  • 1 yellow onion, diced
  • 2 garlic cloves, minced
  • 2 large organic tomatoes, diced (I leave the skin on) or 1 can (15oz) crushed canned tomatoes with juice
  • 2 carrots, sliced
  • 1 bunch Tuscan kale (about 4 loose cups),  roughly chopped and stems removed
  • a pinch or two of red pepper flakes
  • himalayan salt, to taste***
  • cracked pepper, to taste
  • 6 oz of pasta of choice, cooked

1. Start by pre-soaking your beans overnight, or at least eight hours, in a large pot of water filled two to three inches above the beans. Drain and rinse well. 

2. Using same pot you soaked your beans in, add beans, thyme, sage, bay leaves and vegetable broth. Bring to a boil, cover and simmer for 30 minutes. Skim off any foam as needed. 

3. While beans are simmering, prepare your veggies. After the beans have simmered 30 minutes, add in onion, garlic, tomatoes, carrots, and the remaining four cups of water. Bring to a boil, cover and simmer for 50 minutes, stirring occasionally. 

4. While the soup is simmering cook your pasta according to package, set aside. 

5. After 50 minutes, add in kale, red pepper flakes, salt and pepper to taste and simmer for 5 minutes. Lastly add in the pasta, cook five more minutes, taste for seasoning and serve. Serve with some fresh cracked pepper and a drizzle of olive oil if you like. Pairs well with crusty bread. Serves six generously.

* Feel free to use two cans (15oz) beans such as kidney, cannellini, pinto or northern in place of dried beans. You can skip the first two steps and instead, add all the ingredients in step two and three at once, bring to boil, cover and simmer for 30 minutes instead of 50.....continue to step four.....

** I made a second batch and added the smoked paprika and it was delicious! (pix below) I also used a mix of canned kidney beans, pinto beans and black beans instead of cranberry beans, and I even added in some mushrooms and used quinoa pasta...just goes to show this a very versatile recipe...almost anything goes...gotta love it! 

*** Do not use salt while cooking dried beans until the end. Salt will disrupt the beans from absorbing water and it may result in an undercooked bean texture.

Enjoy!

• • •

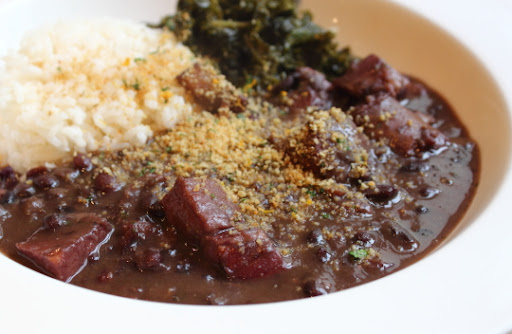
Here is my second batch and it was so good and simple! I've used a combination of canned beans (kidney, pinto & black), quinoa pasta, added mushrooms and included some smoked paprika which gave it a nice warm flavor. I have altered the recipe to include the paprika.


Delicious!


reade more... Résuméabuiyad

Twice Baked Potatoes - They Take Longer, But At Least They’re More Complicated

I don’t do a lot of things in the kitchen purely for esthetic reasons, but these twice baked potatoes are one of my more beautiful exceptions to that rule. You can get almost the exact same flavors by just adding stuff to a regular baked potato, but what you won’t get in that scenario is the impressive, over-stuffed height, and gorgeous, golden-browned crust seen here.

Is it worth it? Only you can answer that. For me, once in a while, for those extra fancy dinners, the answer is a resounding yes. Taste is, and always will be, the most important aspect of cooking, but when entertaining guests on special occasions, don’t forget that you’re putting on a show with the food. And when it comes to starchy side dishes, this is a great way to express that flair for the dramatic.

Like I said in the video, this is a demonstration of technique, and not necessarily a recipe I want you to follow verbatim. I will list what I used below, since I’m required to by food blogger common law, but if there was ever a recipe that you’d want to experiment with, this is the one.

By the way, since there's a certain amount of prep involved here, you can make these ahead of time, up to the point of the second baking, and then just finish when it gets closer to service. I hope you give this show stopping side dish a try soon. Enjoy!


Ingredients for 4 Twice Baked Potatoes:
4 large russet potatoes
3 tbsp butter
1 or 2 tbsp minced green onion
salt, pepper, cayenne to taste
1/2 cup shredded white cheddar cheese
1/2 cup cream or milk
1 egg yolk
Bake at 400 degrees F. for an hour to cook potatoes, and then 20-30 to brown after stuffing.

View the complete recipe

reade more... Résuméabuiyad

Winner! Mac & Cheese Bake


Winner, Winner....Mac & Cheese Dinner!


First off, let me say that this was a supreme hit with my 12 year old daughter who usually turns her nose up at almost everything I make! As a matter of fact, I hear her in the kitchen right now nibbling on the left overs...this is a good day. We have a winner here...this mac & cheese bake will hit the spot for the kids, just don't say a word about what's in it. ;) Now had I added veggies in the bake, it would not have passed which is why this is just a simple recipe. Feel free to add in veggies like broccoli, kale, etc...whatever you may usually add into a mac & cheese bake! 


As for myself, I seriously could have sat there and ate this whole thing myself. I haven't had a mac & cheese bake in I don't know how long. The cheese is just great! I especially love the bread crumbs and the light dusting of smoked paprika I added on top of my portion. I paired mine with some sauteed Tuscan kale which was terrific! 


Vegan Mac & Cheese Bake

Ingredients
  • 16 oz. package pasta of choice (I used rice penne pasta) (works with an 8oz package too)
  • paprika, garnish

For the bread crumb topping
  • two pieces of bread or 1 cup bread crumbs 
  • tablespoon olive oil
  • twist or two of the salt grinder

Cheese Sauce
  • 1 1/2 cup raw cashews, preferably soaked for a 2 -3 hours (aides in digestion)
  • 1 3/4 cups water or unsweetened almond milk, or combo like I did
  • 1/3 cup nutritional yeast
  • juice of one large lemon or 1 tablespoon vinegar
  • 1 clove garlic
  • 2 tablespoons of extra virgin olive oil
  • 1 tablespoon white miso
  • 1 teaspoon onion powder
  • 1 teaspoon sea salt, or to taste
  • 1/4 to 1/2 teaspoon chili powder, to taste*
  • 1/8 teaspoon turmeric
  • dash of cayenne powder 

    Preheat oven to 350 degrees.

    Bring a large pot of water to a boil, cook your noodles al dente and set aside.

    While waiting for the water to boil, start with your bread topping first. I toasted two pieces of bread we had on hand really well and processed them in the food processor until crumbly, a high speed blender will work too. Place the crumbs in a small bowl, drizzle with olive oil and a twist or two of the salt grinder, mix well and set aside. Quickly rinse the processor/blender bowl and move on to the cheese sauce.

    For the cheese sauce: In food processor/blender, combine all of the cheese sauce ingredients except for about 1/2 of the water/milk and blend until creamy. Add remaining water/milk and blend again. Taste for flavor adding anything extra to suit your taste.

    Once pasta is cooked and drained. Add pasta back to the pot it was cooked in, add the cheese sauce and combine well. It may seem like too much liquid but the pasta will take care of most of it.

    In baking dish, pour mac & cheese and top with bread crumbs. Bake for 25 - 30 minutes, check after 15 minutes if crumbs are darkening too much for your liking, cover with foil.

    When done, let cool about 10 minutes and serve. The sauce will thicken upon standing.

    * The chili pepper adds a really nice flavor without being too powerful. If your worried about the spiciness, especially for the little ones, I would suggest using the smaller amount, taste and add more if desired.

    Notes: If you use a smaller baking dish or use ramikins, lessen the cooking time to 10 - 20 minutes depending on the size of dish you use.


    Enjoy!

    Why I ♥ this cheese so much is not only does it taste fantastic and its easy to make, but also because not one cow was harmed, or had their baby taken away, or just simply had to live a life of misery in order to satisfy a taste we have come accustomed to without even realizing how these animals are handled, especially through factory farming. That in itself makes all dairy products undesirable to me. I began my vegan journey for health reasons and soon found out just how unpleasant the meat and dairy industry really is. It is not a question of whether it's wrong or right to consume animals and their products...that depends on your circumstances. But I do believe that in this day and age we live in we simply do not need them to survive, and we definitely do not need to factory farm them the way it is being done.

    Veganism for me is liberation for ALL sentient beings! And it most certainly starts with my fork. :)

    To find out more about the life of factory farmed animals and animal rights you can visit PETA.org for more information.
    reade more... Résuméabuiyad