Pages

.

Raw Cashew Dip - Vegan and Gluten-Free

Raw cashew hummus is creamy, vegan and delicious
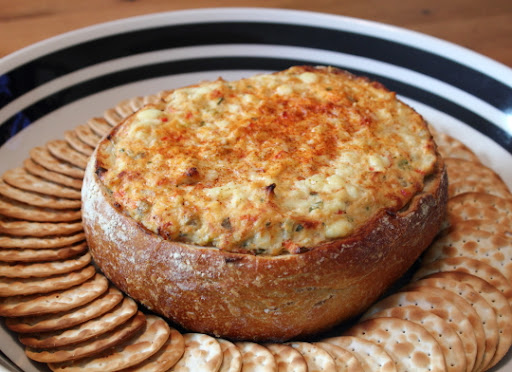
Party worthy. Crisp fresh veggies and cashew dip.

Go Raw for a Creamy Dip


I've been eating hummus all week. Help. I can't stop. It all started when I whipped up a big batch of my tried and true favorite, a classic chick pea hummus recipe with tahini and lemon (though in full disclosure, I used lime juice instead of lemon). I munched it as a party worthy snack, with retro bunny carrot sticks as we rewatched some Mad Men episodes in anticipation of the coming season this Spring (sophisticated serial television that just keeps getting better and better, does it not?). Mad Men is a show with keen originality, surprises, and rare insights into sexual politics, power, culture, and marriage- not only enlightening those of us who lived through the sixties (I was- er, am- exactly Sally Draper's age, so many aspects of the show are akin to watching home movies), but connecting the dots that birthed our current consumer pop culture, in all its tarnished glitz and narcissistic glory.

Then I nestled dollops of the stuff on warm and comforting bowls of brown rice and stir-fried vegetables (recovering from said cultural insights, and newly minted wife-slash-copyrighter Megan's saucy rendition of Zou Bisou Bisou).

I ate and I ate.

And then there was no more. I was hummus-less. Without hummus. Bereft. An empty fragile goddess sans my favorite vegan protein complement.

So I began to scheme.

I pined for the opportunity to blog another hummus recipe, but I'd already shared not only my classic style hummus, but my irreverent upstart hummus with jalapenos, lime and peanut butter (which apparently, on some vegetarian forum raised an anti-goddess ruckus). Not to mention, my roasted red pepper hummus, perfect for 'Party On' mode (I hear tell there's a Big Game approaching).

My thoughts did a shuffle play through new and cool possibilities.

And I remembered my raw cashew cream recipe. Why not make it thicker? Why not make it into a hummus style dip? So I did the sensible thing. I soaked some cashews. And guess what?

Raw vegan deliciousness ensued.

Bisou. Bisou.


Read more + get the recipe >>
reade more... Résuméabuiyad

Duck Fat Roasted Brussels Sprouts – P.H.A.T. with an “F”

With all the rich and decadent football party food I’ve been sharing lately, I’d thought I’d take a little break, and post a nice, simple green vegetable side dish. Of course, these beautiful roasted Brussels sprouts were just a prop so I could demonstrate using leftover duck fat, but still.

If you watch any amount of celebrity chef TV, you’ve undoubtedly heard them going off on the virtues of duck fat. They mostly pontificate on its deep, palate-coating richness, which is true; but they also like to point out the health benefits. That part is a little cloudy…you know, like saturated fat when it cools down.

Duck fat does have much less saturated fat than butter, and is higher in oleic acid, the stuff that makes olive oil so popular with the healthy eating gurus, but make no mistake, this is still an animal fat, and should be used in moderation. The good news: “in moderation” totally works!

A few tablespoons and a very hot oven is all you need to turn some sleepy vegetables into something much more special. As I mention in the video, bacon grease will make a fine (and even more flavorful) substitute, but if you do cook duck, saving the leftover fat is nothing short of mandatory. I hope you give this technique a try soon. Enjoy!


Ingredients:
Brussels sprouts (about 4-6 per person)
salt, pepper, cayenne to taste
enough melted duck fat to coat vegetables generously (about 2-3 tablespoons per pound of sprouts)
fresh squeezed lemon to finish
*Roast at 450 degrees F. until tender but still a little firm, about 15-20 minutes

View the complete recipe

reade more... Résuméabuiyad

Butter Maple Pecan Ice Cream


It's hard to believe January is almost over. Is time flying by or is it just me? And I know it's still winter but who can resist a great ice cream....especially when it's so easy to put together! This is for us who don't have an ice cream maker or are just too lazy to use one. I really love using bananas as a base for my ice creams and this fits in nicely with my collection. Bananas are inexpensive and when fully ripe are as sweet as can be. And they can be dressed up many ways, like this ice cream. I used to love butter pecan ice cream and now I can still enjoy it in a way that is beneficial to myself, tastes great and without using any animals in the process. It's a win, win, win...my favorite kind! I hope you find it as good as I do...


Butter Maple Pecan Ice Cream

Ingredients
  • 3 large or 4 small ripe bananas, frozen or unfrozen*
  • 1/2 cup raw almond butter
  • 1/4 - 1/2 cup pure maple syrup, to taste
  • 1/4 cup tahini
  • 1 teaspoon cinnamon, optional
  • 2 teaspoons or so vanilla extract
  • 1 cup pecans

Place ingredients, except for the pecans, in food processor/high speed blender and process, scraping down the sides as needed, until creamy and combined. Taste for sweetness, adding more maple syrup if needed. Stir in pecans. Place in air tight container and keep in the freezer for at least 6 hours to harden. Let sit for about 10 minutes or so to soften before scooping into serving bowls. Makes about 4 cups.

* If using frozen banana's, you can serve right away as it will be a soft serve ice cream. Or store in freezer to harden completely as above. 

As with any of my recipes, adjust flavors to your own taste...I have made this using 1/4 cup almond butter along with just a few tablespoons of maple syrup and tahini with great success. I have also used less pecans. So feel to play around with the ingredient amounts. 

Enjoy!

You may also like these other raw banana based ice creams...


reade more... Résuméabuiyad

Baked Crab and Artichoke Dip – A Snack So Nice, You Finish it Twice

Nothing says, “this party rocks” like a creamy, cheesy, baked dip, and when you’re talking about a hot crab and artichoke dip, people have been known to put an extra choice word or two before “rocks.” If only there were a big event coming up soon to test this theory.

Not only is this additive dip easy to make, it works with any budget. You can load it up with the finest fresh crab, use frozen or pasteurized lump crab meat, or even canned in a pinch. By the way, (and off the record) I’ve had these made with fake crab, and it wasn’t bad at all.

While the loaf of bread base does make for a nice presentation, not to mention recycled after party snack food, you can simply bake this in a casserole dish as well. As I mentioned in the video, I had a little extra leftover, and if this happens to you, give it a try as a stuffing for ravioli, wontons, or other dumpling-like delivery systems.

No matter which team they’re rooting for, all your guests will be cheering for more of this delicious baked dip. By the way, nothing beats watching your friends play tug-o-war with the crust once the dip is gone. I hope you give it a try soon. Enjoy!


Ingredients for 12 portions of Baked Crab and Artichoke Dip:
2 (8 ounce) packages cream cheese
1/2 cup sour cream
1/4 cup mayonnaise
1/2 cup finely diced red bell pepper
1/3 cup chopped green onions
3 cloves garlic, minced
2 tsp fresh chopped tarragon leaves
zest and juice from 1 lemon
1 tsp Worcestershire sauce
salt and pepper to taste
cayenne to taste
1 pound lump crab meat, drained
1 (14-oz) can artichoke bottoms
6 oz white Cheddar cheese, divided
1 large round or oval loaf sourdough bread
About 30 min at 375 degrees F.
reade more... Résuméabuiyad

Raw Pasta Primavera & Neatballs


Let's uncook something wonderful...


Need I say much about this dish except that is amazing and fresh! This is a nice escape from the salads of the day. I love salads but these raw pasta dishes take it to another level of raw foods that I can really get into. Using fresh herbs will also add to the freshness and flavor. The oregano in the meatballs was just delicious. And sprinkle some of the herbs on top too. Not only are they pretty but the flavors will all mingle and come together for a tasty sensation. You may find yourself craving this raw dish again and again. 


Raw Pasta Primavera + Meatballs

Ingredients (serves 4)
  • 1 orange bell pepper, diced
  • 1 yellow bell pepper, diced
  • tomatoes of choice, diced
  • 1/2 large zucchini, diced
  • 1 -2 green onions, thinly sliced

Pasta
  • 3 zucchini, spiralize or julienne
  • 3 yellow squash, spiralize or julienne

Primavera Sauce
  • 4 roma tomatoes, 8 campari or 2 large tomatoes of choice
  • 1/2 cup sun dried tomatoes, soaked apprx 30 minutes to 1 hour
  • 1 small shallot or 1/2 large
  • 2 tablespoon extra virgin olive oil, optional
  • 1 tablespoon lemon juice
  • 1 tablespoon garlic powder or 1-2 fresh garlic cloves
  • 1/2 cup fresh basil
  • pinch or two red pepper flakes
  • himalayan salt to taste

Meatballs
  • 2 cups mushrooms, sliced (baby bella's or cremini)
  • 2 rounded tablespoons tahini
  • 3/4 cup walnuts, soaked for 4 hours and left to dry 1 hour*
  • 1 clove garlic
  • 1/2 small shallot
  • 1 tablespoon olive oil, optional
  • 2 teaspoons tamari or nama shoyu
  • 2 tablespoons fresh oregano, packed
  • himalayan salt & cracked pepper to taste

Start by preparing your veggies while the sun-dried tomatoes are soaking. Spiralize or julienne (either by hand or with a julienne tool) your zucchini & squash for the pasta. Prepare your diced veggies. Set aside.

Next, place ingredients for the meatballs into your food processor/high speed blender, blend until well combined but still a bit chunky(not too chunky but just a very minimal amount). Taste for seasoning. Scoop out using heaping tablespoons and form into balls. I gently flipped them back and forth between my palms, and once rounded I used my fingers to mold making a nice circle shape. Makes 8. Set aside.

Rinse equipment that the meatballs were made in and start the marinara sauce by placing all ingredients in food processor/high speed blender and combine until smooth or desired consistency. Taste for seasoning. Makes two cups.

Layer pasta in individual serving dishes, top with marinara, a handful of veggies and a couple meatballs. Finish it off by topping with a light dusting of almond parmesan and some fresh cracked pepper.

* There are benefits to soaking your nuts and seeds whenever possible. In this recipe they need to dry out after soaking or the mixture is too wet. For that reason this is an option here, especially if it's not convenient with your time frame. The reason why soaking is a good idea is that it enables your body to digest the nuts & seeds more easily. It also increases the nutrients and allows your body to absorb them more readily. But don't worry if you can't soak, your still getting health benefits. Here is quick article with the essential information and a nice chart of all the nuts/seeds soaking & sprouting times: Benefits of Soaking Nuts

Clean and vibrant...Enjoy!

I want to share with you that you do not need a spiralizer to make beautiful noodle pasta. In this picture I used a simple julienne tool to create a noodle effect...I also have much less to wash and my julienne tool fits right in the utensil drawer.


    reade more... Résuméabuiyad

    Warm Winter Salad with Roasted Banana Squash and New Potatoes

    Roasted fingerling and tiny new potatoes and winter squash on baby salad greens.
    Roasted fingerlings, new potatoes and winter squash on baby salad greens.


    After a long and restless night I am pondering potato salad and glitter. Sleep deprivation may be less than pleasant but it often breaks loose the inertia of stalled imagination (who among us has the power of will to maintain the status quo of the literal linear world after a scant teaspoon of sleep?). In my experience it is not prudent to ignore gifts of associative flight and whimsy. If one begins threading fingerling potatoes with the sequins of burlesque I say, go for it.

    You never know when such a spinning, sparkling muse will visit again.

    It all started with a documentary (on Showtime last night) about the seventies balladeer Paul Williams- a touching story of fame, hunger, redemption and purpose (titled Paul Williams Still Alive because the documentarian had assumed he was dead) that- almost by accident- reveals Paul's award-garnering talent for writing sweet and soulful songs was never balm enough for his childhood wounds. Like so many artists snagged in the media-fueled web of fame + addiction, Paul's appetite for approval trumped all (imagine the tune-smith who wrote Rainbow Connection in an absurdly surreal TV shoot out with sexy Police Woman, Angie Dickinson). Until he got sober.

    And redefined success on his own terms.


    Read more + get the recipe >>
    reade more... Résuméabuiyad

    Fresh from the Oven: Soft Pretzel Bites


    Sometimes a craving will come over us and we just must oblige. That was the case here; I was craving pretzels and wanted to make bite size or at least three bite pretzels bite. They're actually more like a mini pretzel loaf and very rustic looking. Originally, I wanted to make this a gluten free version but unfortunately they did not come out good at all so I decided to try out a version using whole wheat and spelt. To my thankfulness these came out great. They have a somewhat firm crust and a nice soft center and good chew along with a wonderful pretzel flavor. I tried making these two ways, well actually three ways but the gluten free way didn't work, and I much rather prefer the latter for this beautiful crust and pretzel flavor that my prior batch did not have. The trick was the baking soda bath, that made all the difference. Although if you skip this step and just place the pretzel bites in the broiler for a minute or so you will get a pretty color but nothing like these, even the bottoms were caramel color and I didn't even flip them.


    I've included spelt flour in this recipe to break up the whole wheat density a bit. I've read up on spelt and have used it in a few of my recipes, pancakes to be exact. Spelt is a great replacement for whole wheat and all-purpose flours whenever possible for the majority of us. For those with wheat allergies, spelt is a good replacement for other wheat flours. Even though it is in the wheat family it has a different molecule makeup. It even contains more protein than wheat and its nutrients are easily digestible. As for using spelt in breads, I have seen some great yeast breads using all spelt that have come out beautifully and it works here too with this yeast bread. Try some spelt pancakes too, it has a slightly nutty and sweet flavor, you may never go back to regular flour again.

    We all have different tastes and so I encourage you to try this recipe using the various flours to see which ones you like best. This will work with all whole wheat bread flour, unbleached bread flour, even all spelt flour or any combination. If you like making your own pretzels, try the different flours. I will surely tell you that all of your experiments will be tasty ones...


    Fresh from the oven: Soft Pretzel Bites

    Ingredients
    • 1 1/4 cup warm water (100°F - 110°F)
    • 2 teaspoons + 2 tablespoon pure cane sugar, divided
    • 1 packet active dry yeast
    • 1 1/2 cup whole wheat bread flour
    • 1 cup spelt flour
    • 1 teaspoon sea salt (I like to grind mine fine by using a mortar stone)
    • 2 teaspoons olive oil
    • 1/4 cup baking soda
    • olive oil, for brushing
    • pretzel salt or any salt as topping (I used garlic sea salt)

    Method
    1. Pour warm water and 2 teaspoons sugar into bowl of food processor fitted with dough attachment, or an electric mixer fitted with a dough hook. Alternately, you can mix this entire dough mixture in a medium size bowl without any equipment at all while saving washing. Stir water and sugar to combine, sprinkle with yeast and let sit for 10 minutes; yeast should be foamy. 
    2. Add 1 cup flour to yeast and mix until combined. Add salt and rest of flour, mix until combined, about 30 seconds. Beat on medium-low until dough pulls away from the sides of the bowl, about 1 1/2 minutes. If dough is too dry add more water 1 tablespoon at a time and if dough is too wet, add more flour 1 tablespoon at a time (this may all depend on weather conditions). Blend for another 30 seconds. Transfer to a lightly floured board and knead about ten minutes, or until smooth.
    3. Pour oil into a large bowl, swirl to coat sides. Transfer dough to bowl, turning dough completely to cover all sides with oil. Cover with kitchen towel and leave in a warm spot for 1 hour or until dough has doubled in size. 
    4. Heat oven to 450 degrees. Lightly grease baking sheet with coconut or olive oil (parchment and ungreased works too). Set aside. Punch down the dough to remove bubbles. Transfer to a lightly floured board. Knead once or twice, pull off little sections rolling into a 1 1/2 inch ball or oblong shapes. Let the shapes rest until they rise a little, about 15 minutes. 
    5. Next, fill a large, shallow pot with 2 inches of water. Bring to a boil. Add baking soda one tablespoon at a time as it will foam up so be gentle when adding. Add remaining 2 tablespoons sugar. Reduce to a simmer; place half of the bites in the water and poach for 45 seconds on each side. Use slotted spoon to transfer pretzel bites to baking sheet. Continue until all pretzels are poached.
    6. Using a sharp knife slash a shallow cross or straight line across the top of each pretzel bite. With a silicon brush, coat the pretzel bites with olive oil and sprinkle with salt of choice. Bake until golden brown, 10 - 12 minutes or so. Let cool on wire rack, or eat warm. Coat with olive oil once more before eating if desired and sprinkle a little more salt. Pretzels are best when eaten right away or the same day. You can keep left over pretzels at room temperature, uncovered, for one to two days. Do not store in covered container or they will become soggy.
    Serve plain or with your favorite accompaniment. I used dijon and whole grain mustard.

    Makes approx. 16 to 20 

    Enjoy!

    Just for reference, here is my first batch. I used 1/12 cup wheat bread flour and 1 cup spelt in these. I also did these without soaking as I was using another recipe which called for setting them under the broiler for about 1 minute to get a golden color. Although these were very tasty, they still didn't have the pretzel flavor that I was looking for. These were great dipping into olive oil though...it went well with the garlic salt I topped them with. They are more of a bread than a true pretzel.


    Recipe adapted from Smitten Kitchen

    reade more... Résuméabuiyad

    Super Bowl Spoiler Alert: San Francisco 49ers Will Win!

    As promised, here’s my official Super Bowl XLVII prediction, using our patented Buffalo chicken wing bones method. The game will feature the San Francisco 49ers and the Baltimore Ravens, and while I’m sure you’ll have fun either way, recent studies have shown that winning lots of money during a sporting event, results in significantly higher levels of enjoyment.

    And of course, by using chicken wing bones to predict the winner, I don’t waste time and money sifting through information, analyzing game film, or considering any actual facts. This allows me to pass the savings on to you. Anyway, this is obviously not a joke, and I fully expect you to bet your entire savings on this sure thing. Not doing so would just be plain stupid. Enjoy!

    reade more... Résuméabuiyad

    I Dip, You Dip, We Dip

    I just started working on this year's special Super Bowl dip recipe (spoiler alert: it's not low-cal), and thought in the meantime I'd repost this short but delicious collection of previously posted dips. Just click on the recipe name in the caption, and as always, enjoy!

    reade more... Résuméabuiyad

    How to Butterfly, Stuff, Roll, and Tie a Pork Roast Like a Celebrity Butcher

    Like almost all the videos I do, this tutorial for how to butterfly, stuff, roll, tie, and roast a pork loin was inspired by a viewer’s request. However, this was NOT your typical food wish, as it came via Chris LaFrieda, from the celebrated Pat LaFrieda Meat Purveyors

    That’s right. America’s most famous butchers are fans of the channel, and asked me if I wanted to do a video with some of their fabulous meat. After carefully considering the offer for two or three seconds, I agreed, and we decided to show their technique for a rolled, stuffed, caul-fat-wrapped pork loin.

    Not only do the LaFrieda’s star in their own TV show, "Meat Men," but their client list is a who’s who of the country’s top chefs. Their custom burger mixes are legendary, with the most famous being the Minetta Tavern’s “Black Label Burger.” Basically, if you’ve not heard of Pat LaFrieda Meats, you need to turn in your foodie card right now.

    I tried my best to adapt their technique for the home kitchen, and as you’ll see, there really isn’t anything that even an average home cook couldn’t accomplish. For example, the butterflying may not look very elegant with all those slash marks, but in the end it will look amazing, and is a bit easier than the pro method.

    As far as the caul fat wrap goes, you’ll need to go past the supermarket meat case, and talk to a real butcher. Anyone that can get you a large pork loin roast, like the one we used here, will be able to get you a half-pound of caul fat. It really is one of the keys to this procedure.

    Pork loin is so lean, and by covering it in a thin layer of caul fat, you’re adding lots of moisture, as well as another layer of flavor. I highly suggest you find some, and if you don’t use it all for your roast, it makes a perfect casing for some sausage patties.

    Anyway, a very special thank you to Chris LaFrieda, and the rest of the LaFrieda family for the opportunity to share this great technique. I hope you enjoy the video, and it gives you the confidence to try this exciting technique soon. Enjoy!


    Ingredients:
    5-6 pound boneless pork loin roast, butterflied as shown
    salt and pepper to taste (be generous, that’s a lot of meat)
    3 cups any prepared bread stuffing recipe (ones with herbs and dried fruit will be particularly delicious)
    caul fat, as needed
    1 sliced onion for the roasting pan

    Roast at 450 degrees F. for 15 minutes to sear.
    Reduce heat to 325 degrees F. for about 1 1/2 hour OR until an internal temperature of 140 degrees F.

    Pan Sauce Note: Once you remove the roast, you can add a splash of water to the pan, along with a tablespoon of balsamic vinegar if desired. Place over high heat and bring to a boil, scrapping the goodness from the bottom with a wooden spoon. Season to taste, and spoon over sliced meat.
    reade more... Résuméabuiyad

    Spicy Kale Pesto with Zucchini Noodles


    I have been indulging in this dish the last couple days! It's so fresh and good. After making my raw zucchini wraps with kale pesto a few weeks ago, kale pesto has become a regular habit. I did this pesto a little differently than my last, minus the basil and tahini while opting to add in some red pepper flakes and a bit of nutritional yeast. The pesto pairs great with the zucchini noodles, especially with a nice dusting of almond parmesan. It was time to add this simple dish to my raw recipes in hopes to inspire others to join in on this nutritional powerhouse green, in a way that tastes amazing. Kale is king of the leafy greens and the more we can incorporate it into our meal plans the better. I use the lacinato kale, which is my favorite, and there is no bitter taste as far as I can tell. If you find your kale is a bit bitter, try adding a squeeze of lemon to the pesto. And for the zucchini, I can easily eat two in this dish so I have used that as a serving guide (I suppose it would depend on your zucchini size but go ahead and eat as much or as little as you like). I've also added diced avocado to this and it was fantastic. This is a simple meal and comes together fairly quickly. Also makes for great to-go lunches!

    Spicy Kale Pesto with Zucchini Noodles

    Ingredients
    • 2 zucchini per person, give or take, spiralized or julienned
    • grape tomatoes, sliced in half
    • almond parmesan, for topping
    • salt & cracked pepper

    Pesto
    • 1 bunch kale, about 3-4 cups, stems removed and roughly chopped
    • 1/2 cup walnuts, optional
    • 3-4 tablespoon extra virgin olive oil, more as needed
    • 1 or 2 cloves garlic
    • 1 - 2 tablespoons nutritional yeast
    • 1/2 teaspoon himalayan salt, or to taste
    • pinch or two of red pepper flakes
    • juice of 1 small lemon, optional

    Start with the pesto, place ingredients in food processor and blend until desired consistency. Add more olive oil if desired and taste for seasoning, set aside. (Serves two)

    I use a spiralizer to get my curly noodle effect. You can also use a julienne tool or julienne them by hand creating a straight noodle. 

    Combine the kale, tomatoes and noodles together in a medium size bowl and transfer to individual serving dishes. Top with some almond parmesan and enjoy!


    Notes: To create a creamy pesto, you may also like to add 1/2 cup walnuts or pine nuts. Or try 2-3 tablespoons tahini instead.

    reade more... Résuméabuiyad

    Chipotle Roasted Chickpeas in a Jar

    Chipotle Roasted Chickpeas in a Jar
    Chipotle Roasted Chickpeas in a Jar

    When you need a great snack on the go or just around the house, these roasted chickpeas will come in handy. They are full of nutrients, fiber, protein, all the good stuff your body needs and texture and flavor your taste buds with thank you for. These are super versatile, you can do just about anything with them in the way of seasoning. Have fun experimenting with various flavors to keep it interesting and fun!


    So easy to put together. I start with dried chickpeas, soak them overnight and cook them before roasting. You can just as easily use canned chickpeas as well, just be sure to drain and rinse them well. Once coated (as shown above) place in the oven...


    When done, let cool a few minutes and they are ready to go. Keep them in a jar and they will be handy to take along with you for whenever the snacking urge occurs...

    Chipotle Roasted Chickpeas in a Jar

    Chipotle Roasted Chickpeas in a Jar

    Ingredients
    • 2 cups chickpeas, cooked...or 1 (15 oz) can garbanzo beans (aka chickpeas), drained and rinsed
    • 1 tablespoon sesame or olive oil
    • 1 teaspoon chipotle powder
    • 1/2 teaspoon garlic powder
    • salt to taste

    Preheat oven to 400 degrees.

    Place ingredients in a small/medium size bowl and combine well. Place in a single layer on a roasting pan or rimmed cookie sheet. Bake for about 40-50 minutes mixing them around every 15 minutes or so until chickpeas have a nice roasted look and are crispy. Let cool for 10 minutes before serving. 

    Feel free add extra spice if you like a little spicier. Also, mix up the spices using whatever you like such as chili powder, cayenne pepper, cumin, curry, thyme, smoked paprika, vinegar & salt, cinnamon, sriracha, lime, garam masala, salt & cracked pepper, lemon pepper, nutritional yeast, etc...

    Keep your jarred chickpeas crunchy by adding some rice to bottom of your jar or container. They seem to soften up a bit once sealed away, the rice will help soak up extra moisture to keep them crunchy. You can also keep them in a container that let's air flow through so they can keep their crunch and be sure to eat within a few days.

    Chipotle Roasted Chickpeas

    However you spice them...Enjoy!

    reade more... Résuméabuiyad

    Savory Gluten-Free Scones with Olives and Rosemary

    Savory Gluten-Free Scones with Olives and Rosemary
    Gluten-free scones with olives and rosemary. A savory winter treat.

    One of my holiday surprises was this nifty cast iron cornbread pan. This week I put it to good use. To celebrate the recent return of Downton Abbey, you see (season two has begun, and promises to be as riveting as the first). Scones somehow seemed more appropriate than cornbread. Though these scones would most certainly not pass muster with Violet, Dowager Countess of Grantham. She would be- most assuredly- appalled. And raise an elegantly arching, ironic eyebrow in utter disdain. Gluten-free? Who ever heard of such a thing? It is as suspect and deserving of mockery as electricity.

    Or weekends.

    Who is your favorite Downton Abbey character?

    I honestly cannot decide (though I may have inadvertently revealed some vaporous hint of favoritism). I love them all with a devoted heart. The cast, the superb writing, the stunning photography, the lustrous set design is all beyond delicious.

    But if you, darling, cherish a favorite Lady, attorney or housemaid, or if you blush and inhale when the honorable Mr. Bates makes an appearance, please do share. We'd love to relish every detail along with you.

    Make your case.

    Read more + get the recipe >>
    reade more... Résuméabuiyad

    Banana Mandarin Smoothie


    This is my new absolute favorite smoothie as of late. Mandarin oranges are in season and I can't seem to get enough! Here you have my recipe for a glass of fresh beautiful goodness... 


    Place peeled banana & mandarins along with other ingredients into blender and blend until smooth. Ready in minutes! Serves one


    Notes: If using frozen bananas, eliminate the ice cubes. Double or triple this recipe for a meal. Also, try some kale if you like. I've also ran out of greens and used micro greens or have just doubled up on the protein powder.

    • • • 

    For the hemp protein powder I purchase either Bob's Red Mill from my local Sprout's store which usually costs about $10.00 for 1 pound. Or I also like this organic one from Living Harvest which also comes in a 1 pound package for a few dollars more. If your local grocer or health food store doesn't carry it, you can order online.

    Hemp seeds are amazingly healthy. They are a great source of protein for those living the plant based lifestyle. Containing all of the essential amino acids, they are a complete protein. Unlike soy protein, hemp protein is readily digestible! It contains no gluten and has a perfect Omega-6 to Omega-3 ratio, part of that Omega-6 is the highly sought after fatty acid, GLA (Gamma linolinec Acid). GLA fights inflammation and Platelet-stickiness...also, us women can take it for PMS.

    Your hemp powder can be used in smoothies and shakes. You can even replace up to 25% of the flour in your baked goods with hemp protein powder although it will change the color slightly of your baked goods. One serving size is 2 tablespoons and contains about 50 calories, 1.5 grams fat, 0 cholesterol, 0 sodium, 3 grams fiber, 6 grams protein. It's a perfect accompaniment to this smoothie making this a great snack or meal any time of day! 

    Enjoy!

    View my smoothie and many others at The Smoothies & Juices Best Recipes Pot Luck Party!

    Cheers to good health and great smoothies. :)

    reade more... Résuméabuiyad

    Gaining Weight at the Taste Awards

    No, not from all that Schiltz smoked goose, but from those two gorgeous medals hanging off my neck. Speaking of gorgeous, as great as getting the hardware was, it was even more special to catch up with old friends, like Sara from Average Betty (right), as well as meet new ones, like Laura Vitale from Laura in the Kitchen (left).


    I want to give everyone who voted for us one last thank you for taking the time to support what we’re doing here. I’ve said it many times before, but you're the best and most loyal fans on the web! Thank you very much.
    reade more... Résuméabuiyad

    White Chocolate Goji Berry Truffles


    Soft and subtle is a great way to describe this White Chocolate Goji Berry Truffle. These little gems have a nice mellow white chocolate flavor with a speck of color and light flavor from the goji berries. They went over so well with everyone I shared them with. So make a batch for you and a batch to share with your loved ones and friends. They will love you for it!

    White Chocolate Goji Berry Truffles

    Ingredients
    • 4 oz or 1/2 cup raw cacao butter, melted
    • 1/3 cup goji berries, soaked a few minutes to soften
    • 1 1/4 cup cashews, soaked 2 hours and drained
    • 7 medjool dates, pitted 
    • 2 tablespoons pure maple syrup, coconut nectar or agave*
    • 1 vanilla bean, seeds scraped
    • 1 tablespoon vanilla extract
    • dash of himalayan salt
    • 1/4 -1/3 cup shaved cacao butter or unsweetened shredded coconut, for rolling

    Start by placing the raw cacao butter in a small saucepan and heat on the lowest setting. Keep an eye on it while you start putting the rest of the truffles together, swish it around every once in a while. At this low temperature it won't burn and should melt completely within five minutes or so. Once melted, turn off heat and set aside until ready to use.

    Place the goji berries in a small bowl and add about 1/2 cup water, let soak a few minutes and drain. This will help soften them.

    Combine the cashews, dates, sweetener, vanilla bean seeds, vanilla extract and salt into your food processor/blender and blend until completely combined and you have a smooth consistency. With equipment turned off, slowly add the melted cacao butter and blend again until combined. Transfer truffle mixture into a small/medium bowl, mix in the goji berries. Place mixture in the refrigerator for about 20-30 min. Scoop out rounded tablespoons full and roll into balls. Makes about 14.

    Roll in shaved cacao butter or shredded coconut. For shaving the cacao bar I used a vegetable peeler and broke up the shaved pieces with my fingers. It flakes nicely like you see in the pictures.

    Store in an air tight container on the counter for up to one week, refrigerator for up to three weeks or so, or freeze for much longer storage. 

    * I prefer to use maple syrup. I have seen good and bad for agave and have decided because of the conflicts to only use pure maple syrup as my sweetener of choice. I personally feel that they don't taste that much different. I understand that some do not like the maple flavor and agave will be the choice for them. I suggest doing your own research to see for yourself whether agave is the right choice for you. You can also start using coconut nectar as a sweetener of choice.

    Notes: If you like you can use 3/4 cup cashews and 1/2 cup oats. Just be sure to process the oats first creating an oat flour of sorts before adding in the cashews and the rest of the ingredients. 


    Enjoy!

    P.S. Don't forget to share the love. :)

    reade more... Résuméabuiyad

    Baked Eggplant Sandwiches – Get’em While They’re Room Temp!

    I didn’t intend for this baked eggplant sandwich to turn into yet another Super Bowl party food post, but two bites in and I realized that’s what may have happened. The reason for this epiphany had nothing to do with taste or texture, but with temperature. I’d forgotten just how truly delicious these are served at room temp, which was always how the Italians I learned this from served it.

    Of course, like any normal person faced with a warm, cheese-filled anything, I ate one as soon as possible, and it was great. Golden-brown and crisp on the outside, soft and gooey on the inside. However, when I went back for seconds an hour later, I got to experience these in all their cooled-off glory.

    While not as crispy, they were still crunchy around the edges and featured an entirely different flavor profile. Hot salami isn’t the greatest expression of the sausage maker’s art, and you really don’t appreciate the eggplant’s subtle sweetness playing against the cheese when hot.

    I’m not sure exactly why, but Italians seem to have a thing for room temperature fried foods, especially vegetables. I’ve heard Mario Batali talk about this before, but there seems to be a long tradition of letting fried stuff cool down first before eating.

    Happily, this practice works perfectly for entertaining, since you can bake these off ahead of time, and put them out on a tray anytime. Whether for your Super Bowl party, or not, I hope you give these addictive eggplant sandwiches a try soon. Enjoy!


    Ingredients for each eggplant sandwich:
    2 thick slices eggplant (Note: some people salt the slices to draw off liquid, which they say is bitter. I’ve done this for other eggplant recipes, but not for these sandwiches. With the breading and filling, I actually think the slight bitterness is an advantage.)
    3 thin, small slices of salami
    1/2 slice provolone cheese
    1 generous tablespoon olive oil, divided
    seasoned flour as needed (flour with enough fine salt, pepper, and cayenne so that it tastes “seasoned” when you dip your finger in it)
    beaten eggs, as needed (2 eggs is enough for about 4 sandwiches)
    plain breadcrumbs, as needed
    1 tsp very finely grated Parmesan cheese
    reade more... Résuméabuiyad

    An Award-Winning Smoked Goose

    I’m heading down to Los Angeles tomorrow for the Taste Awards, and in addition to the medals we won for “Best Food Program: Web” and “Best Home Chef in a Series,” we also were gifted a smoked goose by one of the show’s sponsors, Schiltz Foods

    While the picture may look food styled and photoshop’d, I can assure you it was not. These delicious geese really are as gorgeous as you see here, and I thought I’d repost the video below as a little thanks to the fine folks at Schiltz for this year’s bird.

    The Taste Awards may not yet have risen to match the prestige of the James Beard Awards, but the last time I checked, those guys weren’t getting any free poultry, so there. To read the original post, and get the ingredients, just follow this link. Enjoy!

    reade more... Résuméabuiyad

    Winter Salad with Creamy Orange-Ginger Dressing


    With winter abound, this is a great way to enjoy some of the winter fruits while they are in season. Colorful, flavorful and filling, this salad will be sure to brighten your winter days. The creamy orange-ginger dressing is so light and refreshing. It's like eating an orange creamsicle with ginger added, just delicious. The flavors of the fruits along with the quinoa and bed of greens all mingle together creating a truly fantastic winter salad. So fresh, vibrant and healthy! 


    Winter Salad with Creamy Orange-Ginger Dressing

    Ingredients
    • greens of choice (I used a spring mix)
    • 1/4 cup cooked quinoa
    • 1 or 2 tablespoons pomegranate seeds
    • 1 tangerine or cuties (mandarines), slices

    Orange-Ginger Dressing
    • 1 cup oranges, peeled, navel or valencia...mandarines would be great too (about 2 small or 1 large)
    • 1/2 cup cashews, soaked for 2-3 hours
    • 1/2 cup water
    • 1 - 2 tablespoons apple cider vinegar, to taste
    • 2 - 3 tablespoons fresh ginger, chopped
    • 1/2 clove garlic
    • himalayan salt to taste

    For the dressing, place all ingredients into food processor/blender and process until creamy, about 3 - 5 minutes depending on your equipment. For a thinner dressing add 1 tablespoon water at a time until desired consistency. Makes about 3/4 cup. Store leftovers in airtight container in refrigerator for up to a week.

    For a simple single serving dressing, use the juice of two squeezed oranges and add a tablespoons of fresh minced ginger, mix and top on your salad.

    Enjoy!

    reade more... Résuméabuiyad

    Beef Goulash! Thick Hungarian Soup, Thin Austrian Stew, or None of the Above?

    I’m not sure how authentic this goulash recipe is, since the recipe I use is adapted from one by Austrian chef Wolfgang Puck. Austria is Hungary-adjacent, and I’m pretty sure they were the same country once, but still, the Puckmeister’s version, further modified by me, is closer to a stew called "Pörkölt." Apparently true goulash, or Gulyás, is much more like a soup, and is served with dumplings.

    Okay, two things. First, when it comes to a main course, I like stew more than soup. If you want to stay truer to the original, add more liquid. That’s not going to bother me, or Wolfgang. Also, since I operate in a universe ruled by Google, I went with “goulash” since it’s a thousand times more recognizable than pörkölt. When’s the last time you heard someone say they were craving a big bowl of pörkölt?

    Of course, none of this helps my American viewers who, thanks to the cafeteria ladies from our childhoods, think “goulash” is a tomato, hamburger, and elbow macaroni casserole. I’m assuming that variation was born when some Hungarian (or Austrian?) immigrant tried to stretch the last few ladles of soup/stew into another full meal.

    Anyway, now that we’ve cleared up absolutely nothing, I can talk about this gorgeous dish of food. I adore everything about this dish. The color is stunning, the beef is sticky and succulent, and paprika-based sauce is incredible.

    By the way, I’ve heard from my people on YouTube that this is never served on noodles. How do you say, “whatever” in Hungarian? Despite our questionable naming, ingredients, and side dish, this made for a fantastic winter dinner, and I hope you give it a try soon. Enjoy!


    Ingredients for 4 large portions of beef goulash:
    2 tablespoons vegetable oil
    2 1/2 pounds boneless beef chuck, cut into 2-inch cubes, seasoned generously with salt and pepper
    2 onions, chopped
    2 tsp olive oil
    1/2 tsp salt
    2 teaspoons caraway seeds, toasted and ground
    2 tablespoons Hungarian paprika
    1 teaspoon freshly ground black pepper
    1/2 teaspoon cayenne
    1 tsp dried marjoram leaves
    1/2 teaspoon dried thyme leaves
    4 cups chicken broth (1 to deglaze pan, 3 more added to stew)
    *Note: real goulash is more like a soup, so if you want yours thinner, just add 2 or 3 extra cups of broth.
    1/4 cup tomato paste
    3 garlic cloves, crushed
    1/2 tsp salt, or to taste
    1 bay leaf
    1 tsp sugar
    2 tablespoons balsamic vinegar
    *Simmer for about 2 hours, or until tender
    Garnish with sour cream and fresh marjoram if desired.

    View the complete recipe

    reade more... Résuméabuiyad